
Following up on our previous article – introducing the Cisco Modelling Lab, we will continue our CML series by showing you, step by step, how to start using it for free!
Let’s start and follow these easy steps:
- Access Cisco’s DevNet Sandbox: https://developer.cisco.com/site/sandbox/
- Log in with your existing account or sign up for free.
![]()
- Click on “Get Started with Sandbox”.
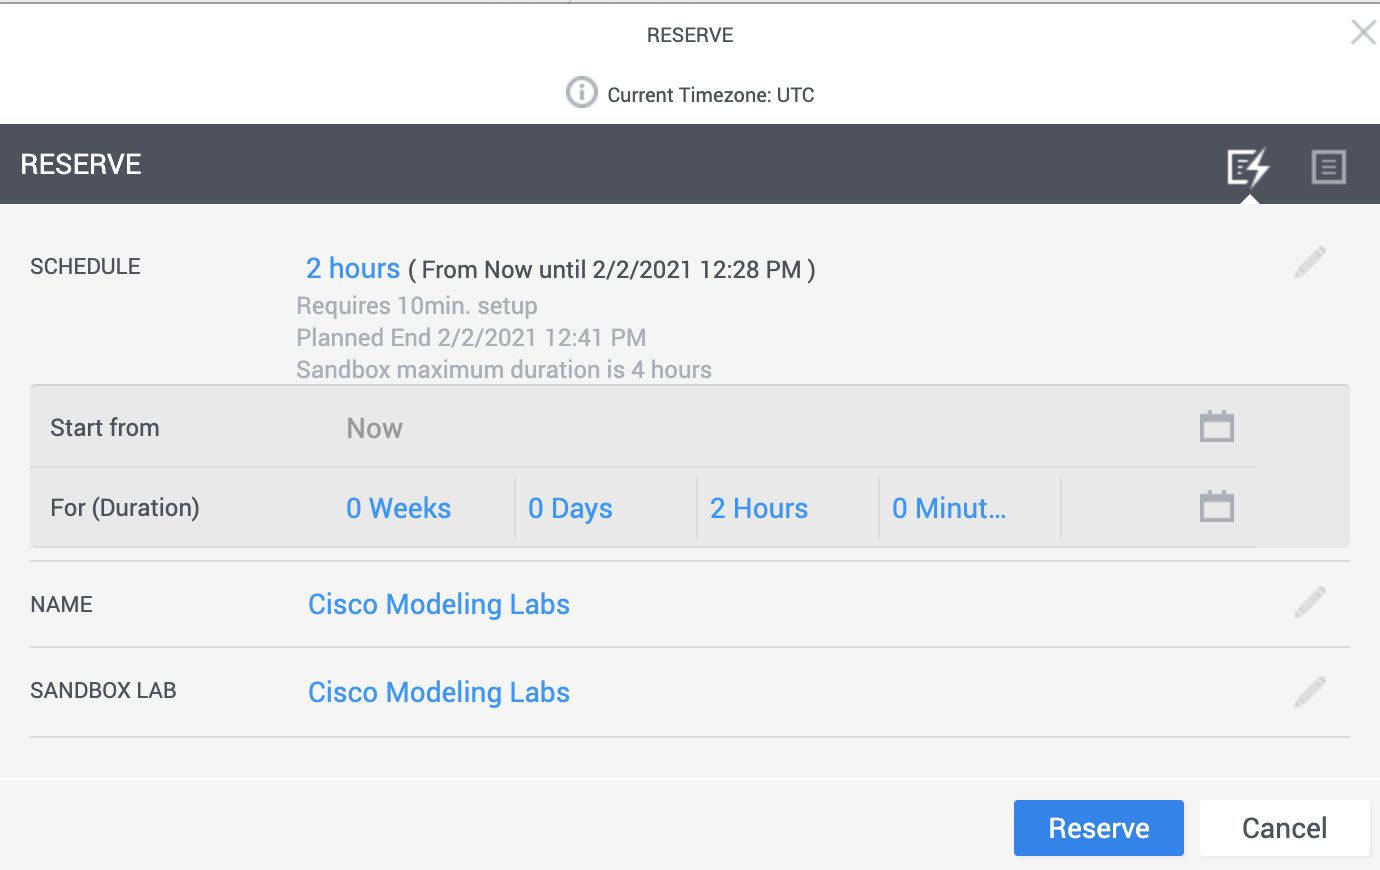
- Look for “Cisco Modeling Labs” and click on RESERVE.

- Reserve the time you want to use it – the default time is 2 hours and you can reserve it up to 4 hours. You cannot extend your reserved time more than a total of 4 hours.
- You will see the following screen where the environment will be set up. At the top right corner, you will see a green button that says “SETUP” and the remaining time for the setup to be completed, once it’s ready you will receive an email. In the meantime, you can continue with the VPN installation explained in the next step.

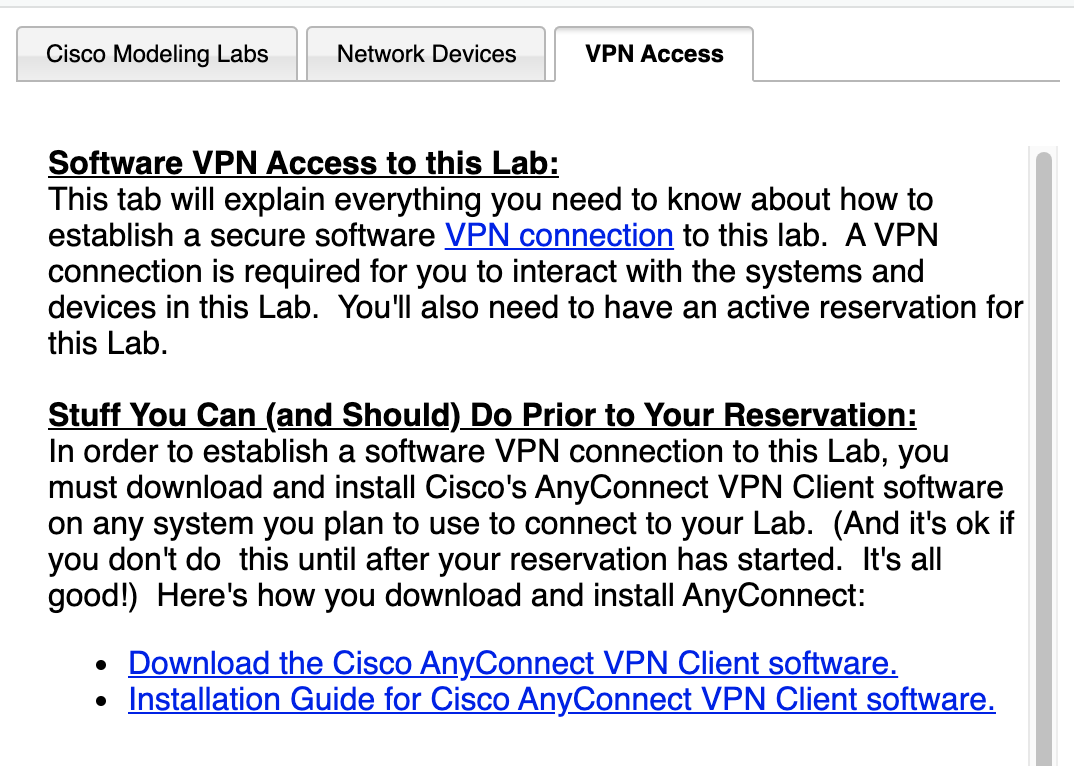
- You will need a VPN connection via Cisco AnyConnect VPN to access the devices. First, you will need to download “Cisco AnyConnect VPN Client”, click on the VPN Access tab to find the instructions and the download link for the VPN Client.
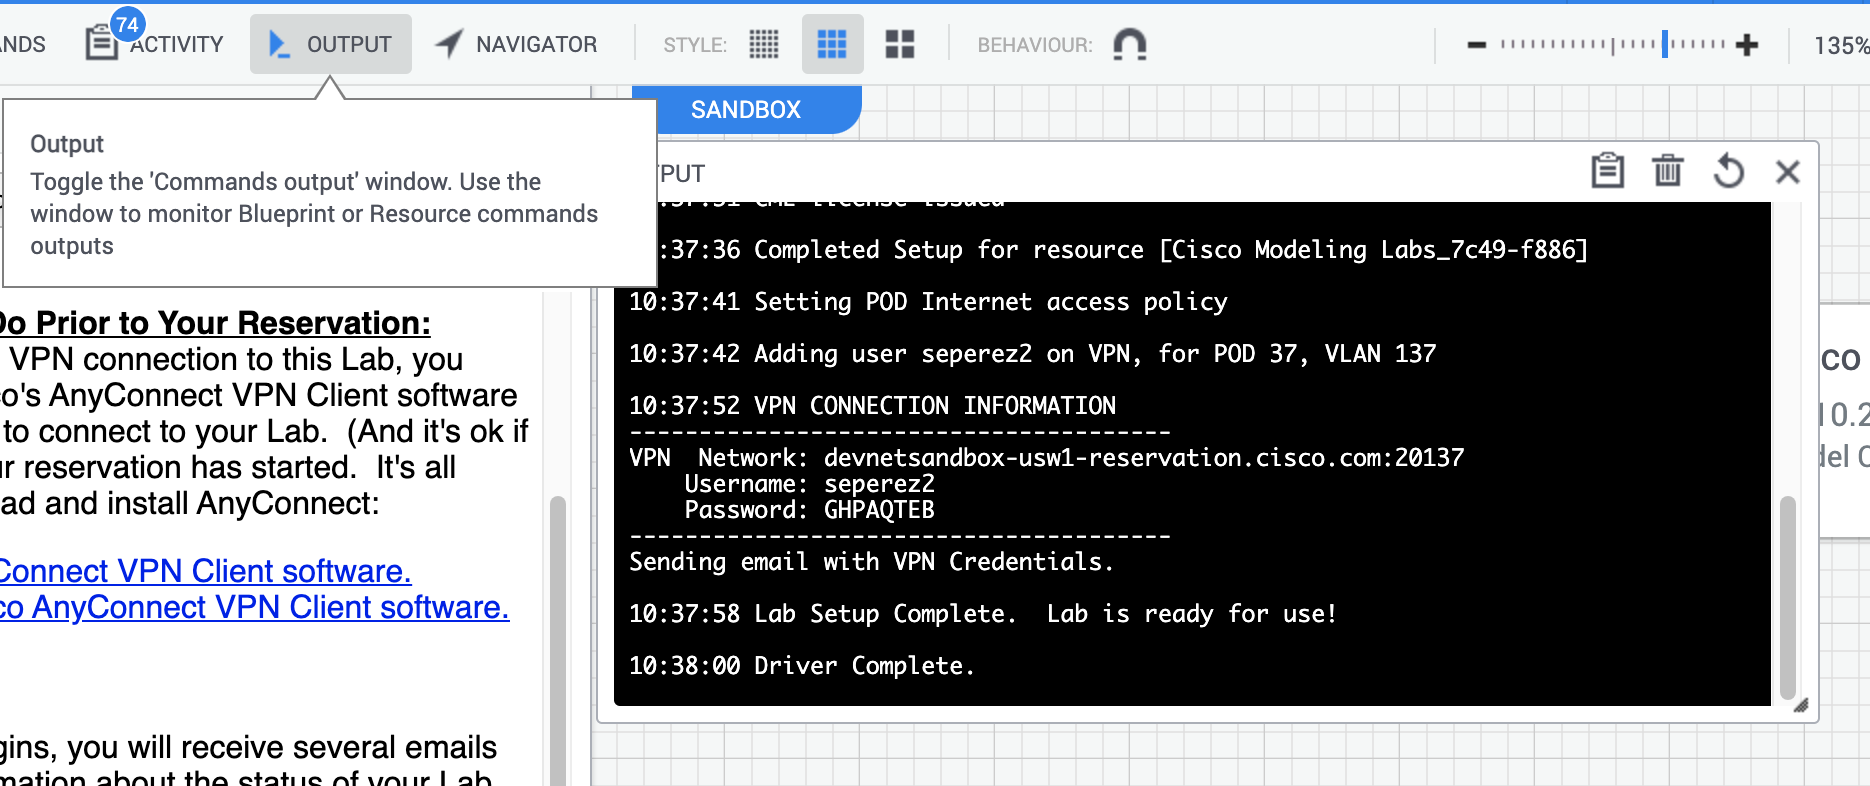
- When you have the VPN Client installed and the Setup is ready, click on the Output tab to check your credentials to access your lab, also you will receive them via email.
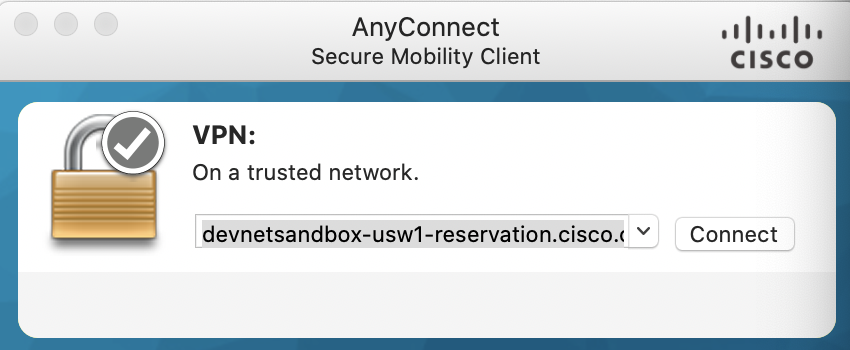
- With the credentials you received, copy the VPN Network (LAB Network Address) name into AnyConnect and click Connect:
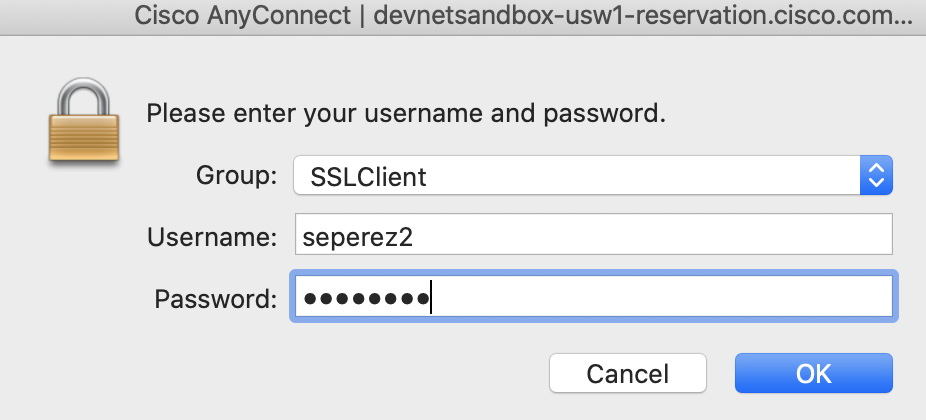
- Insert the username and password and click OK:
- To access the lab environment, click on the “Cisco Modeling Labs” tab. Scroll down to the Cisco Modeling Labs server information and click the link provided in “Example Connection”. NOTE: You may receive a connection not trusted warning, click on advance and proceed:
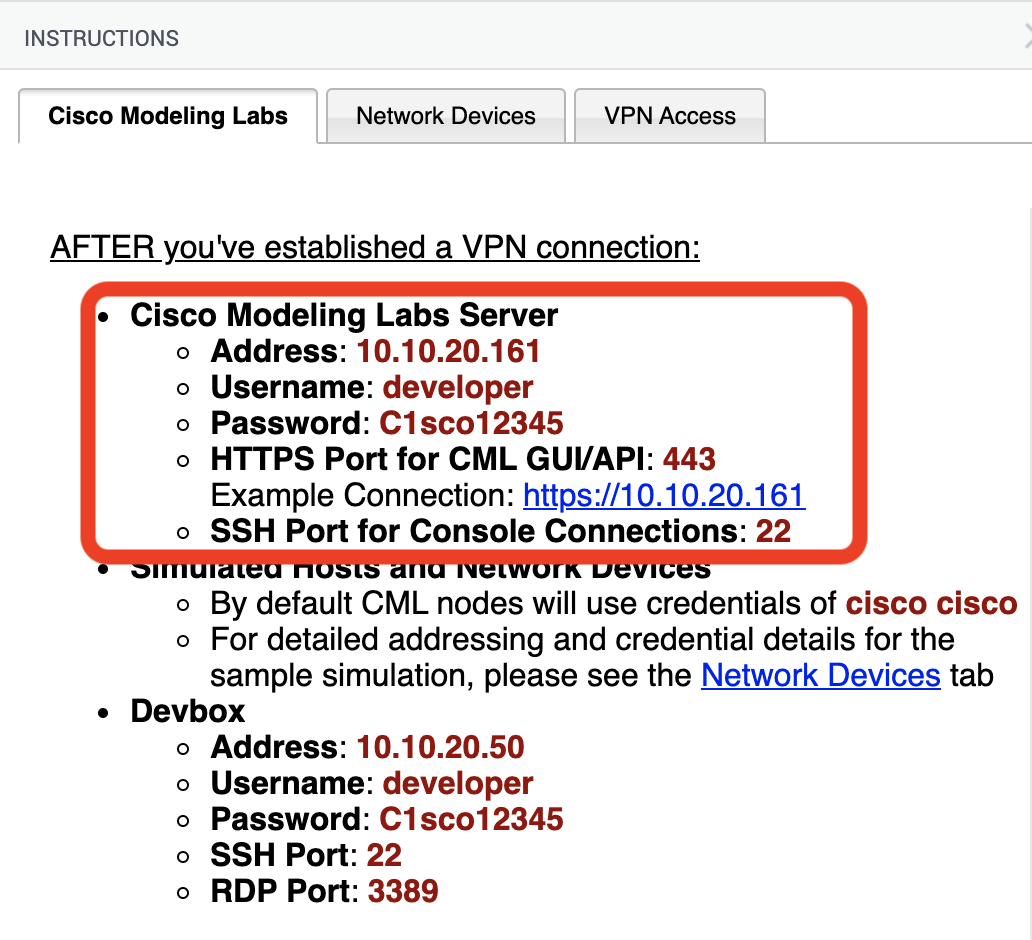
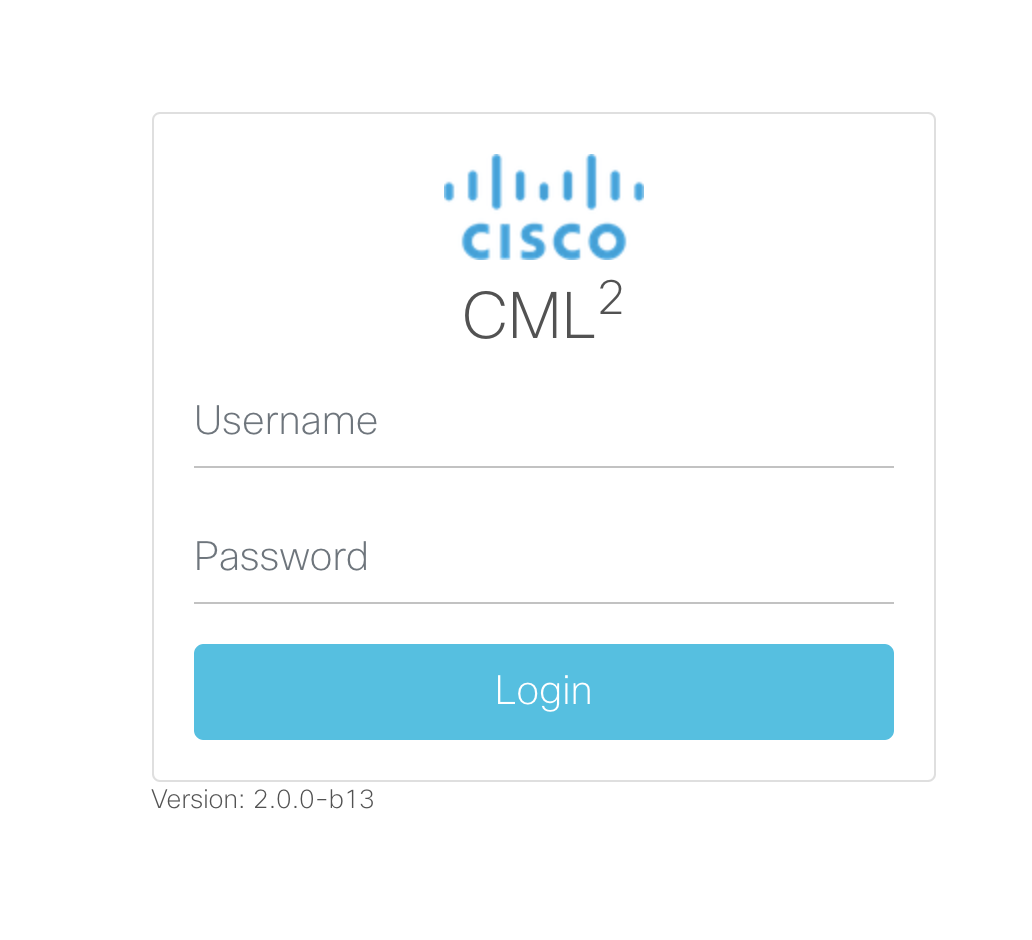
- It will open the login screen where you will use the credentials from Cisco Modeling Labs Server information, from the previous image:
- You will access CML where you can start doing your own labs. It will come with a predefined network to start checking all the features available:
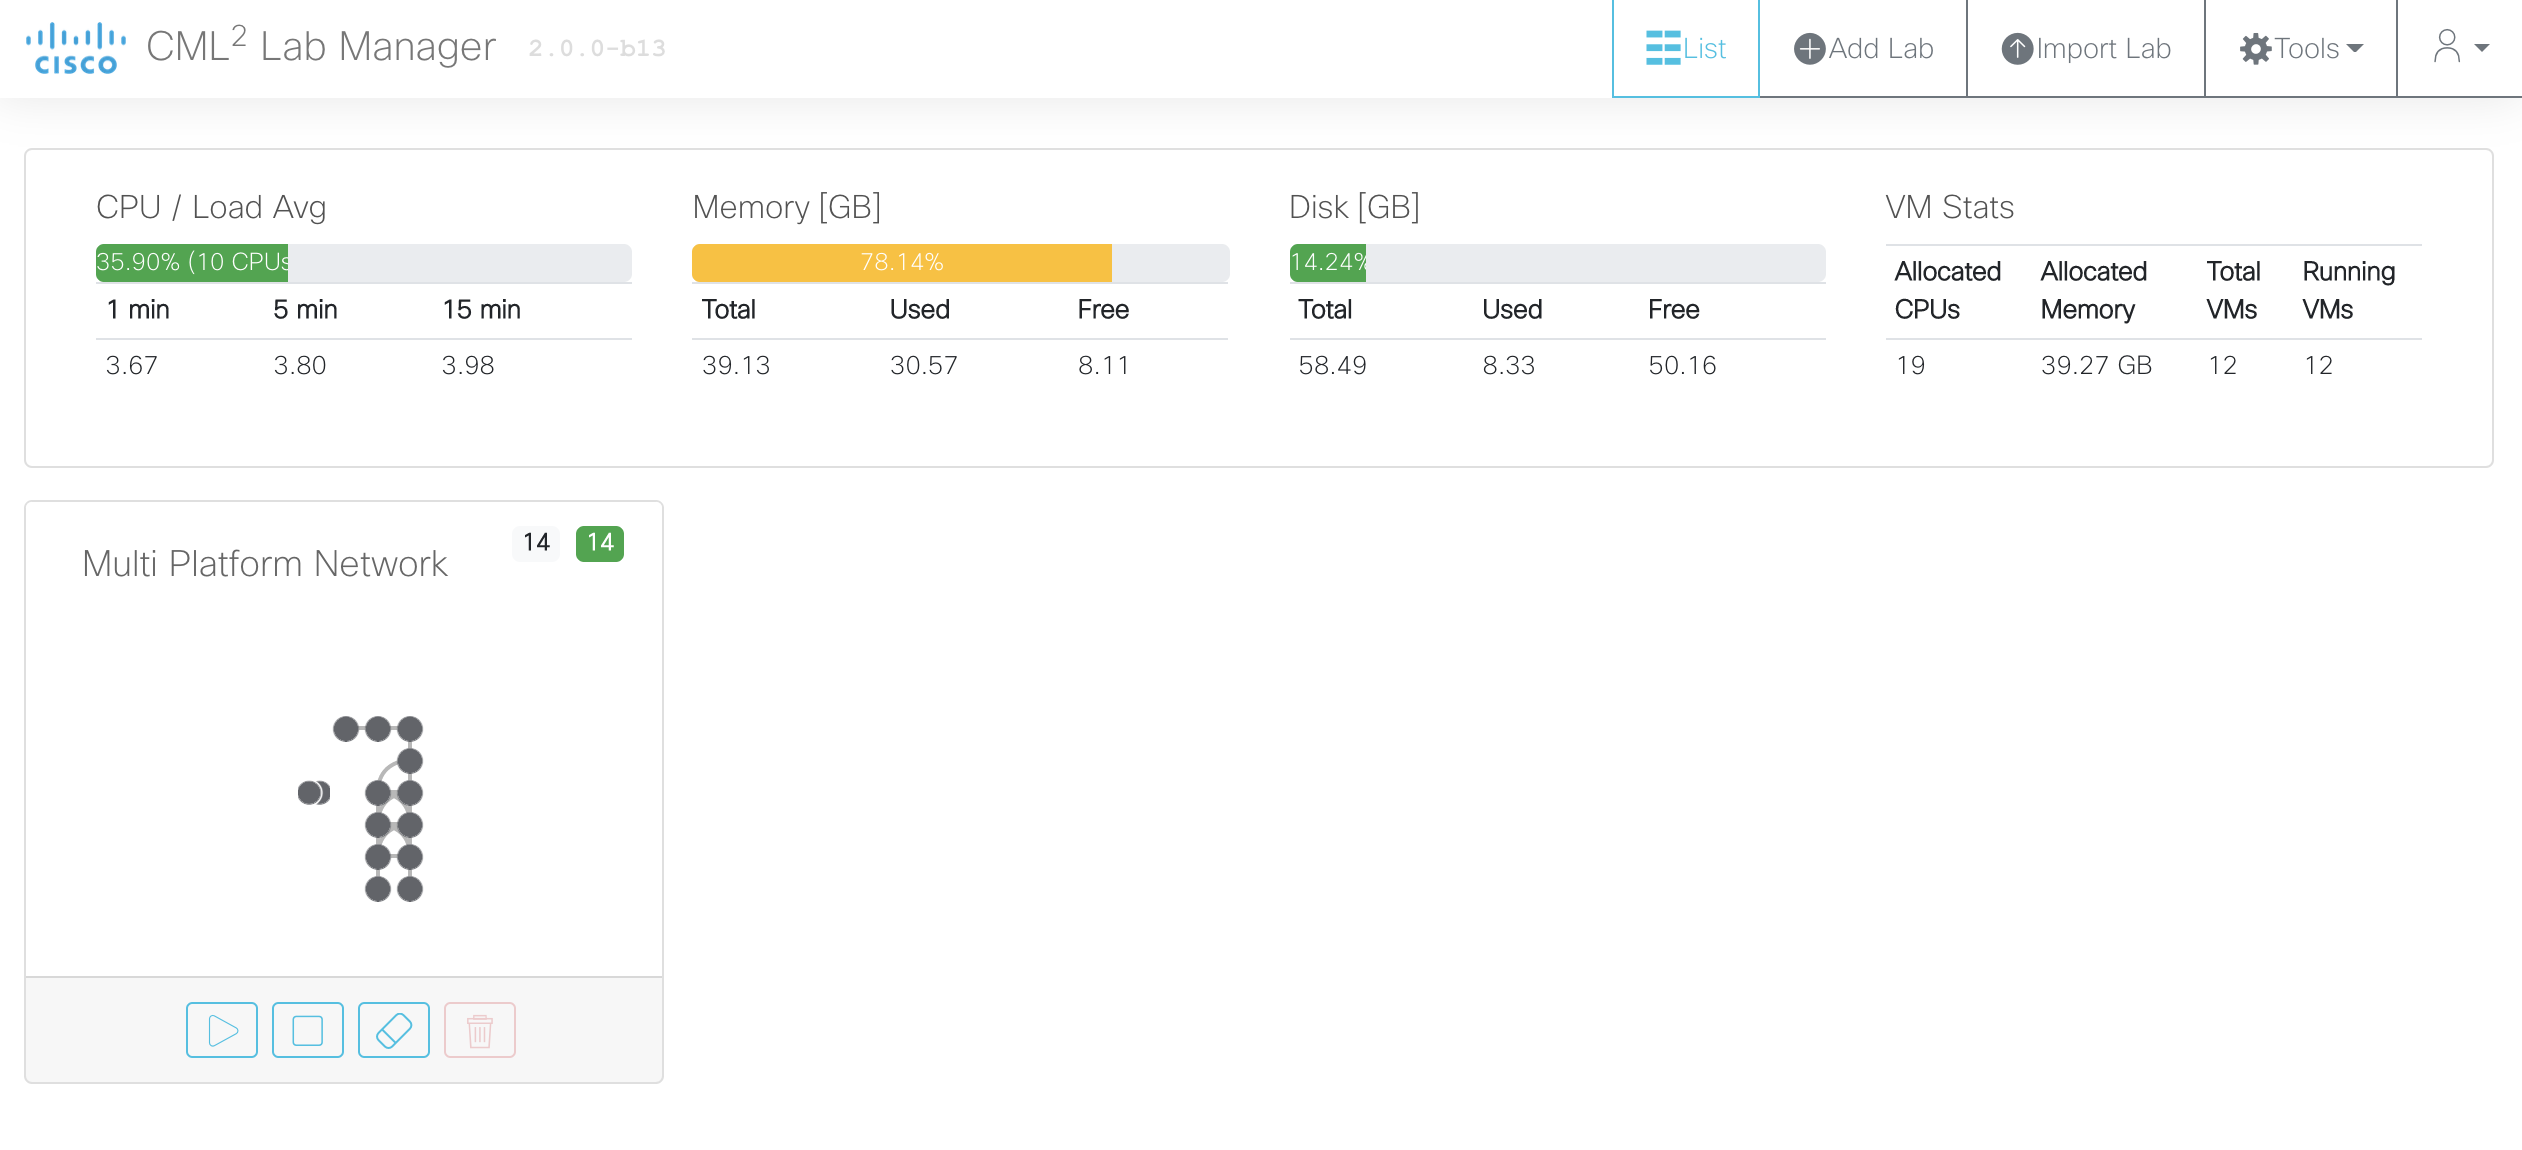
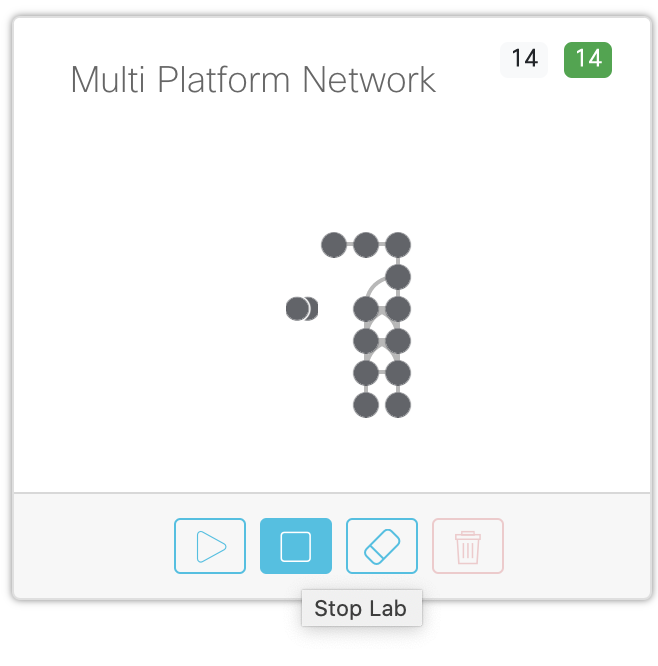
- If you want to create your own network, you will need to stop the current topology because it’s taking 14 out of 20 nodes that you have available.
- To create your own lab, click on Add Lab at the top right corner of the screen:

- Add a name to your LAB and create it:

- Click on your lab and it will open the design window, with the drag and drop interface.
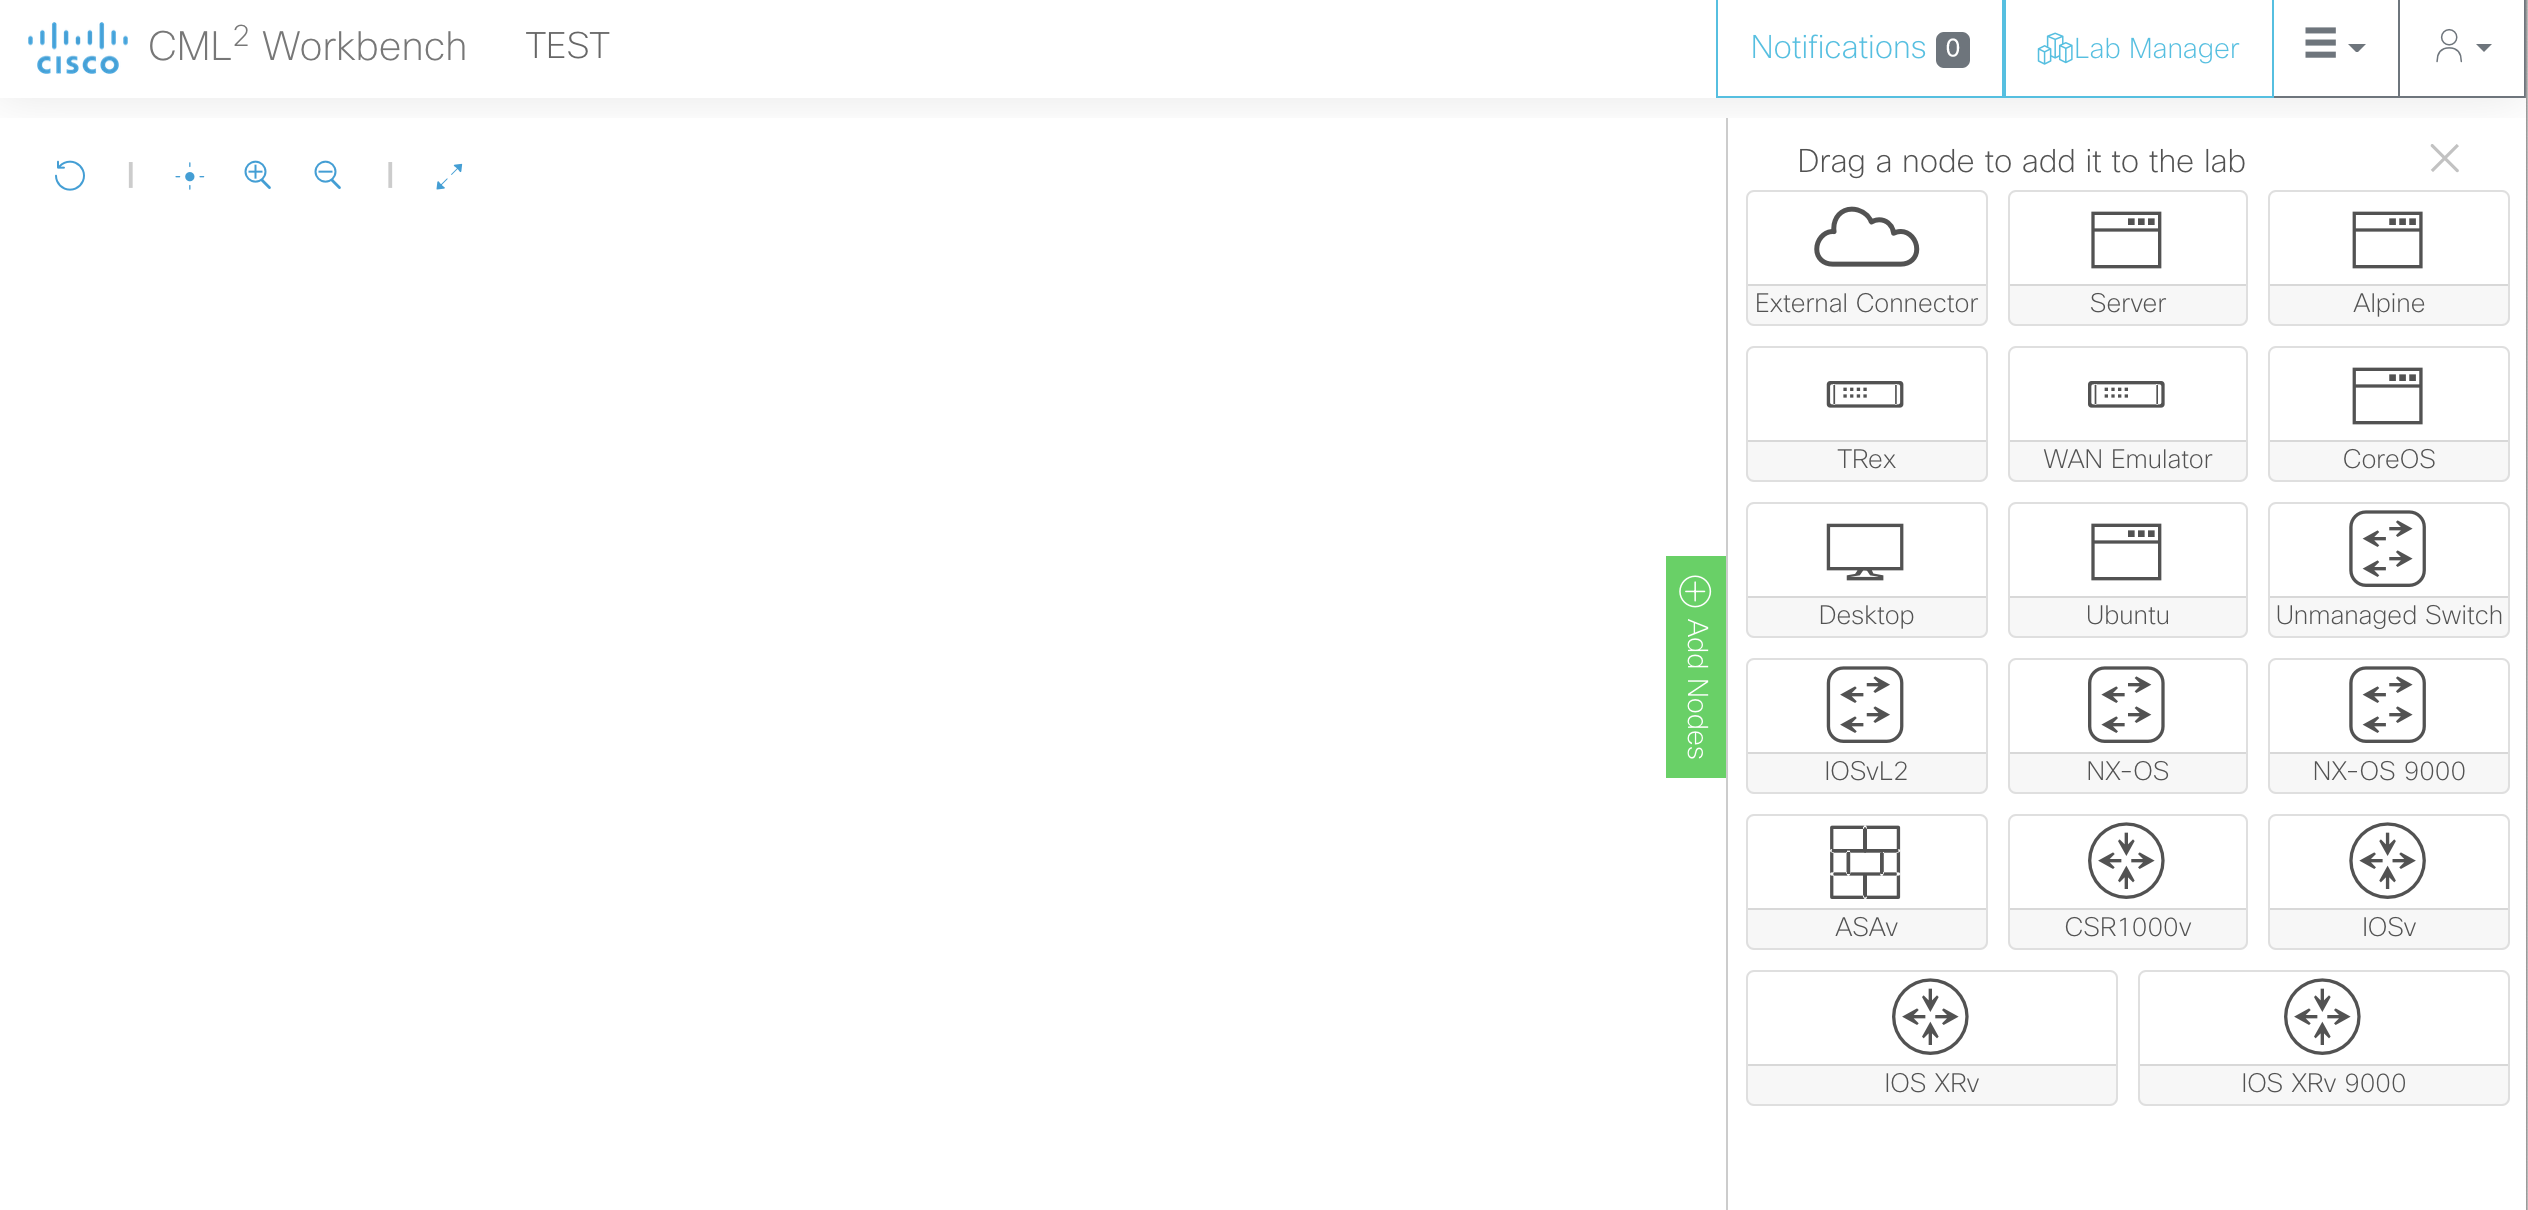
In this window, you can start to add devices and connect them. In our next post, we will see how to start your first topology and how to configure some routing protocols.
Authors

Comentar